a[data-testid="login-btn"]) in ten different tests, you save it once as an “Element.” If that button’s selector ever changes, you only have to update it in one place, not in all ten tests.
This makes your entire test suite incredibly robust and easy to maintain.
Key Features
- Store (Element Tagging): A Store acts as a folder or a tag for your elements. This is just like a “Page Object” file (e.g.,
LoginPage.jsorCheckoutPage.js). By assigning elements to a Store (like “Login Page”), you keep your elements organized and easy to find. - Merge: Sometimes, you might accidentally save the same element (or selector) twice but with different names. The Merge feature allows you to combine these duplicates into a single, master element. This cleans up your element list and ensures consistency.
- Update Existing: This is one of the most powerful features. If a selector for a saved element becomes flaky or breaks, you can update it once in the Elements tab. This change will automatically apply to every single test that uses that element, saving you hours of manual work.
How to Create and Save an Element
You can easily save a new element directly from the test composer.- In Compose Mode, find a test step that uses an element you want to save. Click the step to expand it and see the action details.
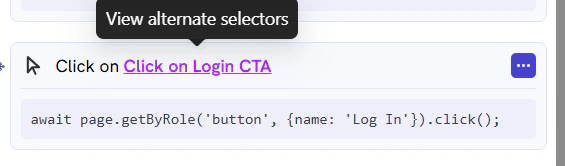
- The UI will show the selectors the AI found for that element. Click the “Save to Store” button.

- A new pop-up will appear. Fill in the details:
- Name: A clear, human-readable name (e.g., “Login Button”).
- Description: A brief note on what this element is.
- Store: Select an existing Store (e.g., “Login Page”) from the dropdown. If you’re using this for the first time, you can also select the option to create a new Store directly from here.
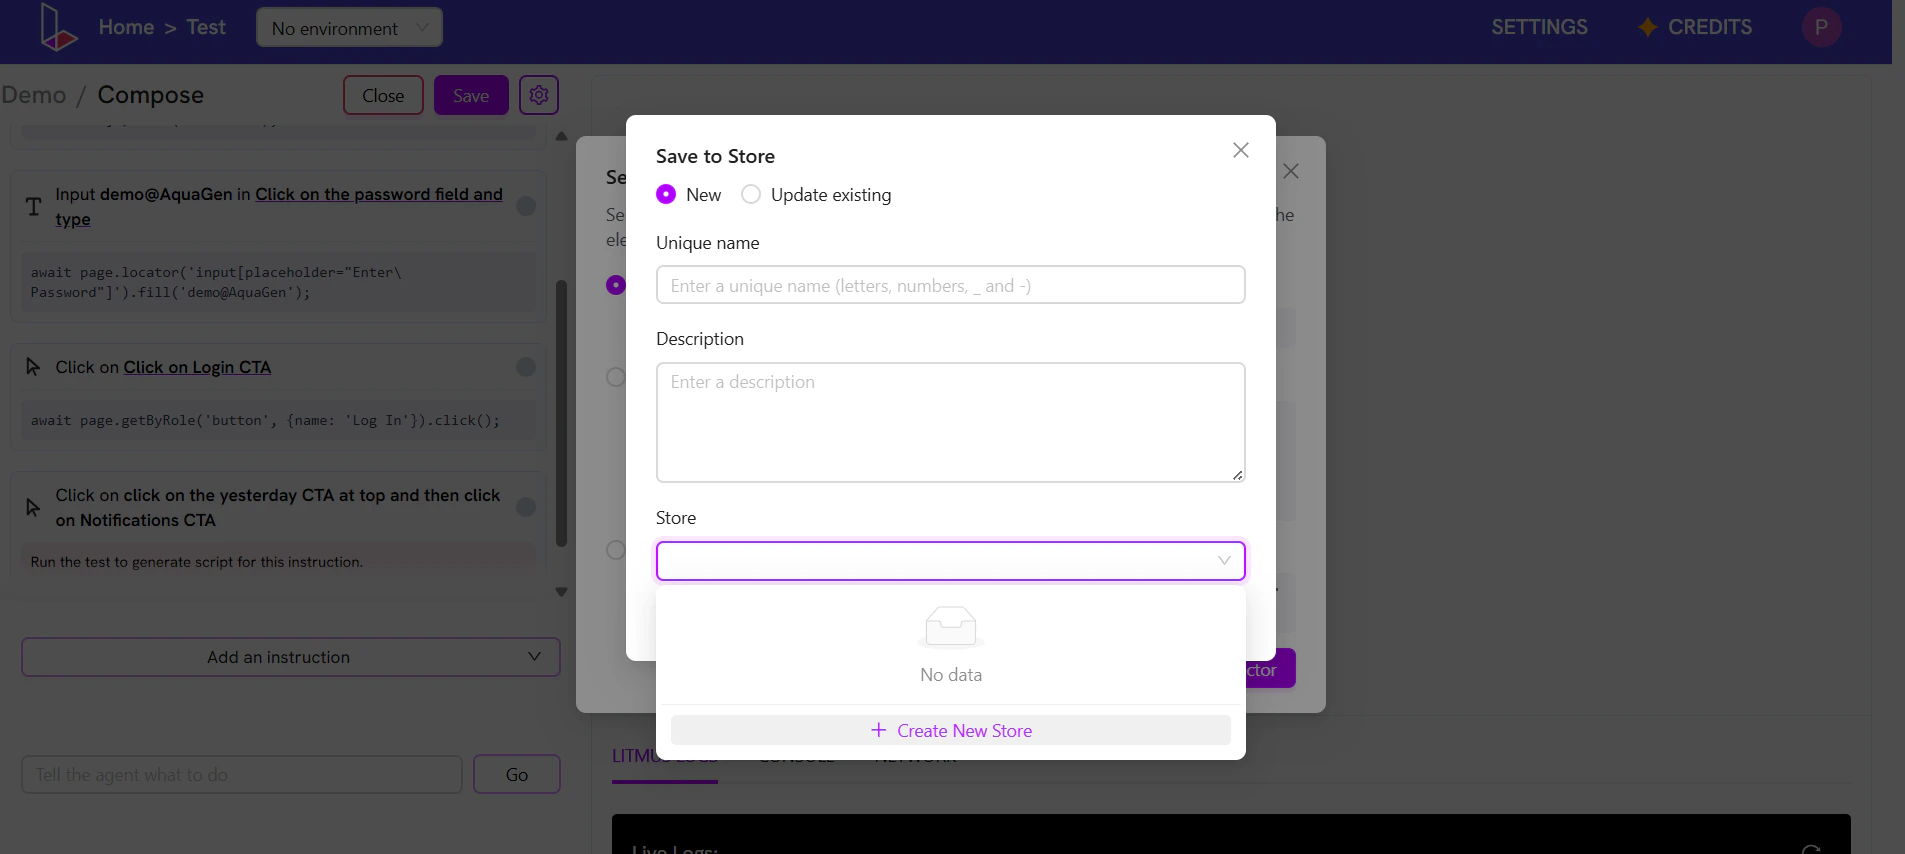
- Click “Save”. The element is now saved as a reusable Page Object.
- Now, in any test, you can select this element from the “Existing Element” dropdown instead of using the “New Element” AI prompt.
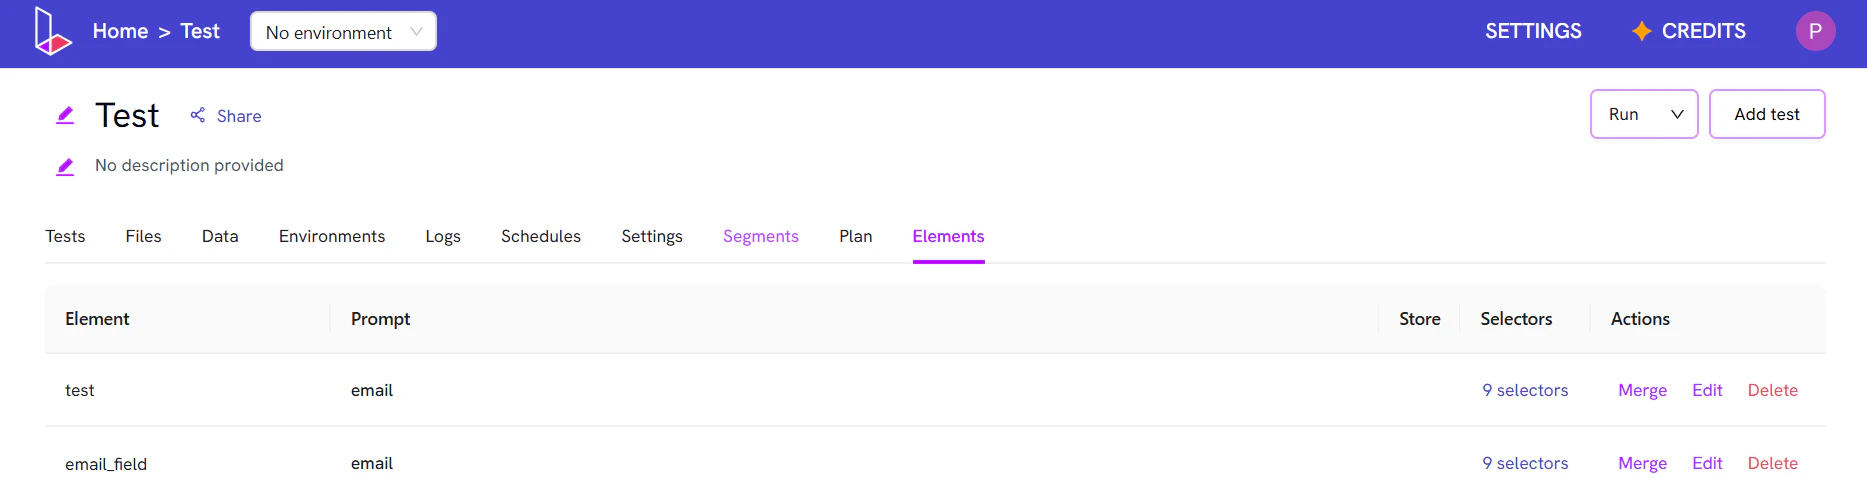
Managing Your Elements
After you’ve saved elements, you can manage them all from the main Elements tab. From here, you can:- Edit: Click an element to update its name, description, or store.
- Merge: Select multiple elements to merge them into one.
- Delete: Remove elements you no longer need.
- Selectors: Update the selector in case you want to change them.\